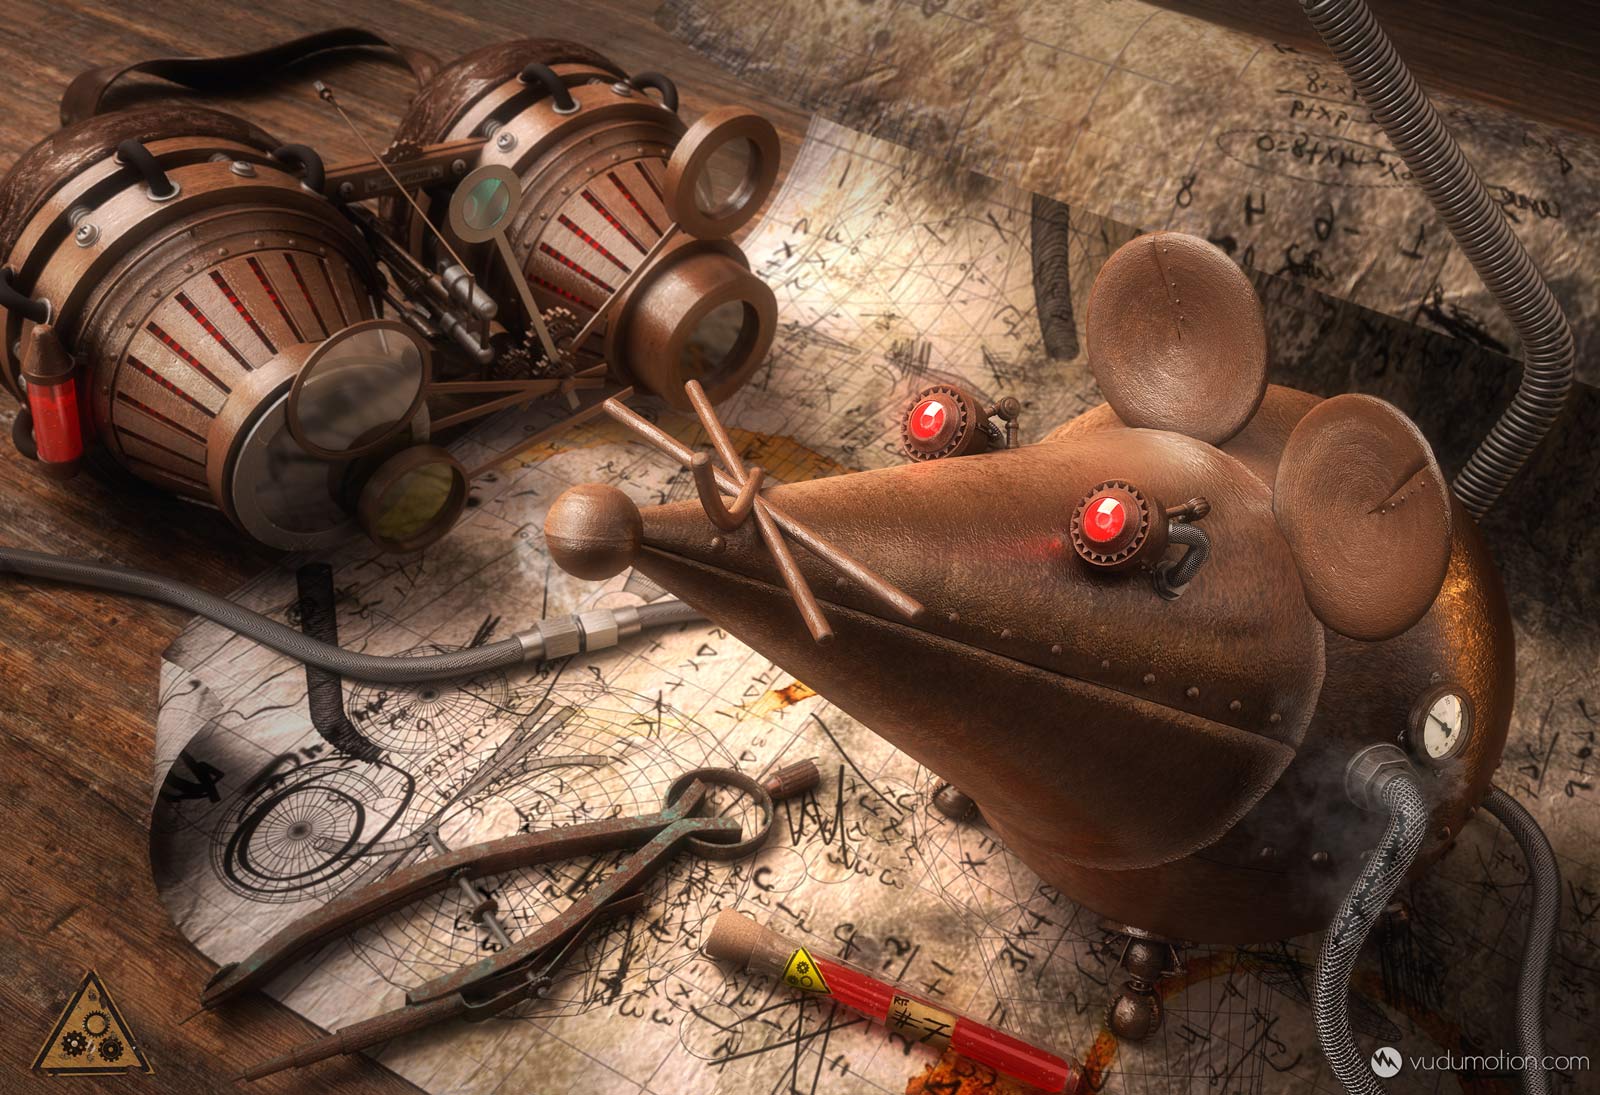
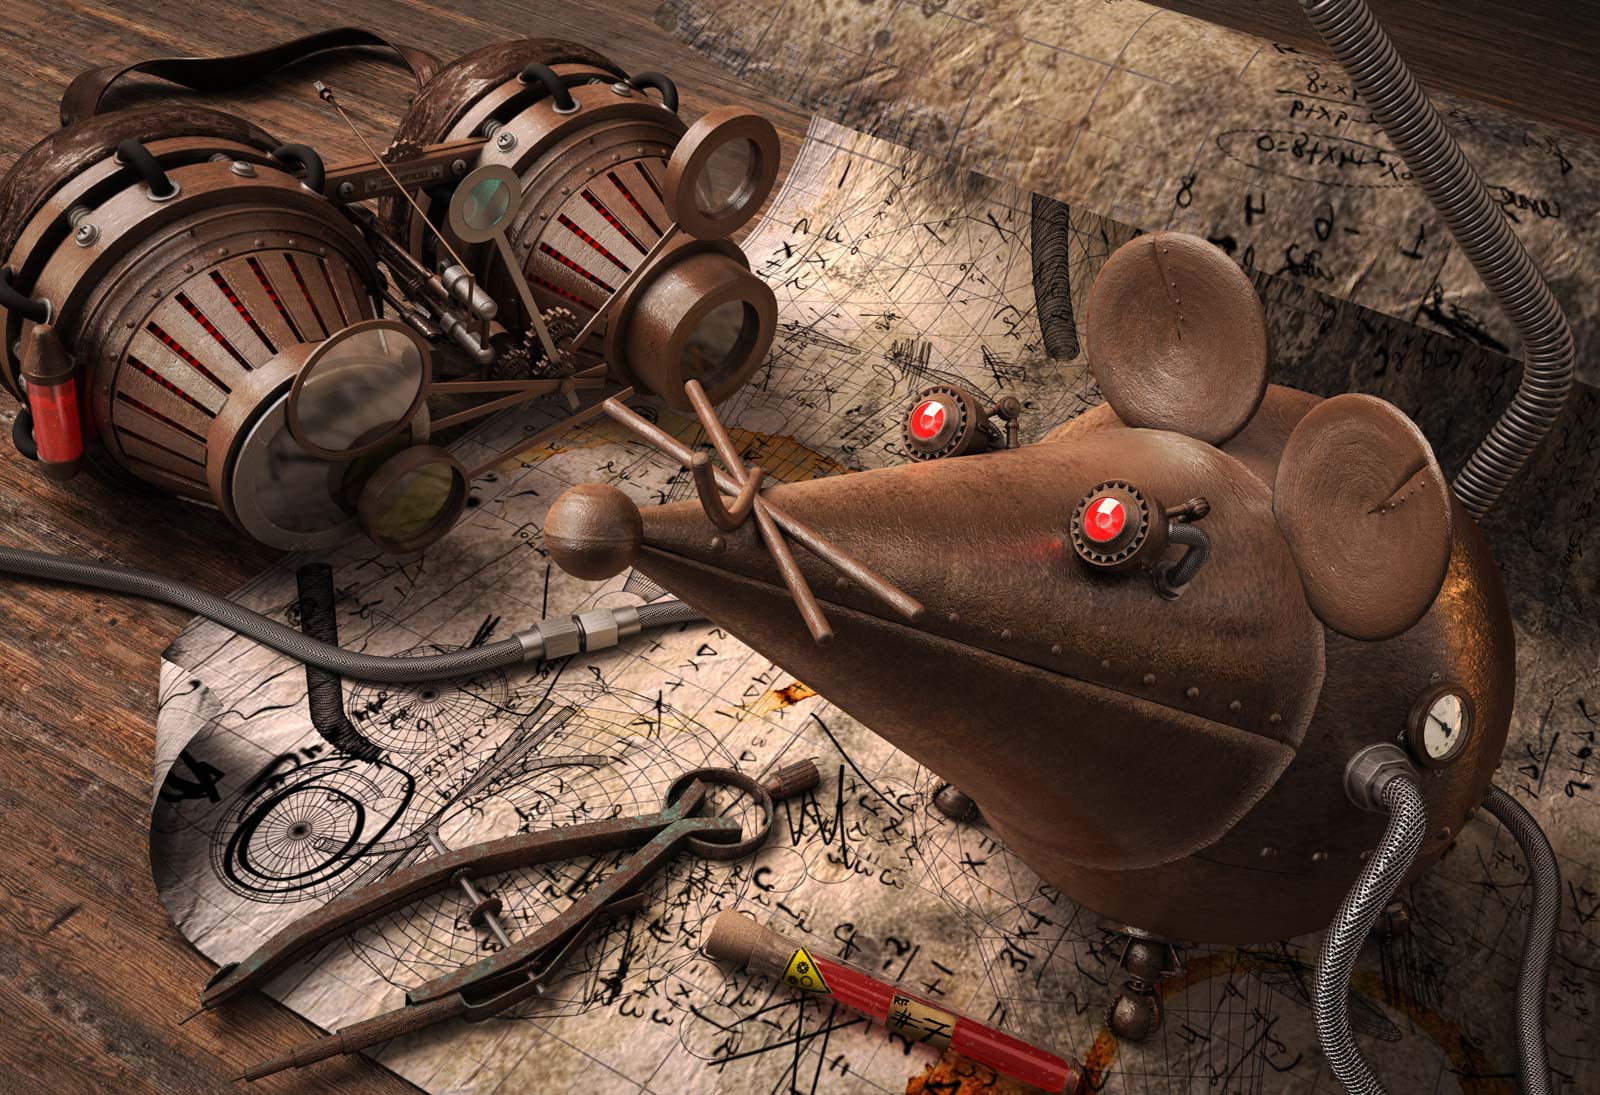
Dušan made a very nice close up of Rodent prototype a few weeks ago. Well lighted and carefully designed materials were the point of his shot. We asked him to write a short making of article about his workflow and he kindly prepared it for all of us. Enjoy it!
Hello everyone. It’s a great honor to be published in Vrayworld. I’m happy to share the process of creating Rodent Prototype and I hope you will find it helpful.
I spend a lot of my free time on personal projects. Client work can be challenging, but I find trying to bring my own ideas to life most appealing and those ideas appear in a random fashion. That's why I always carry my camera and a sketchbook with me.
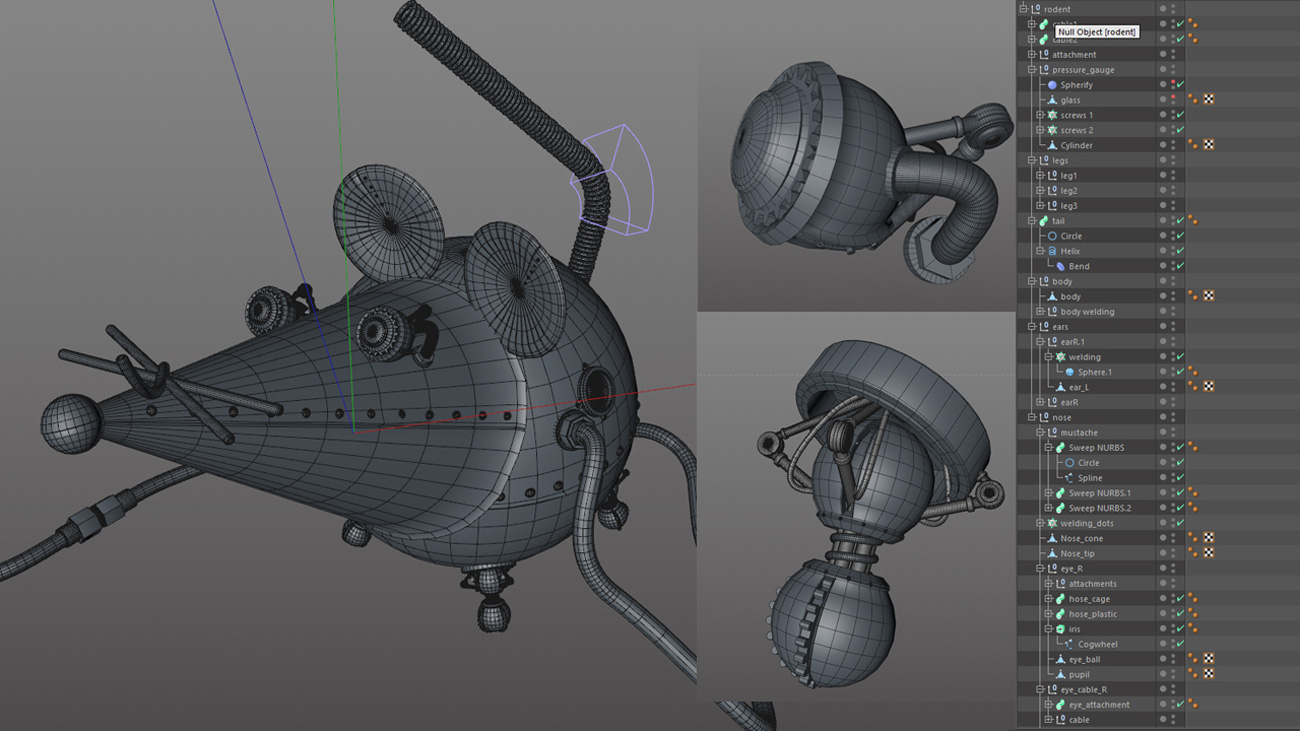
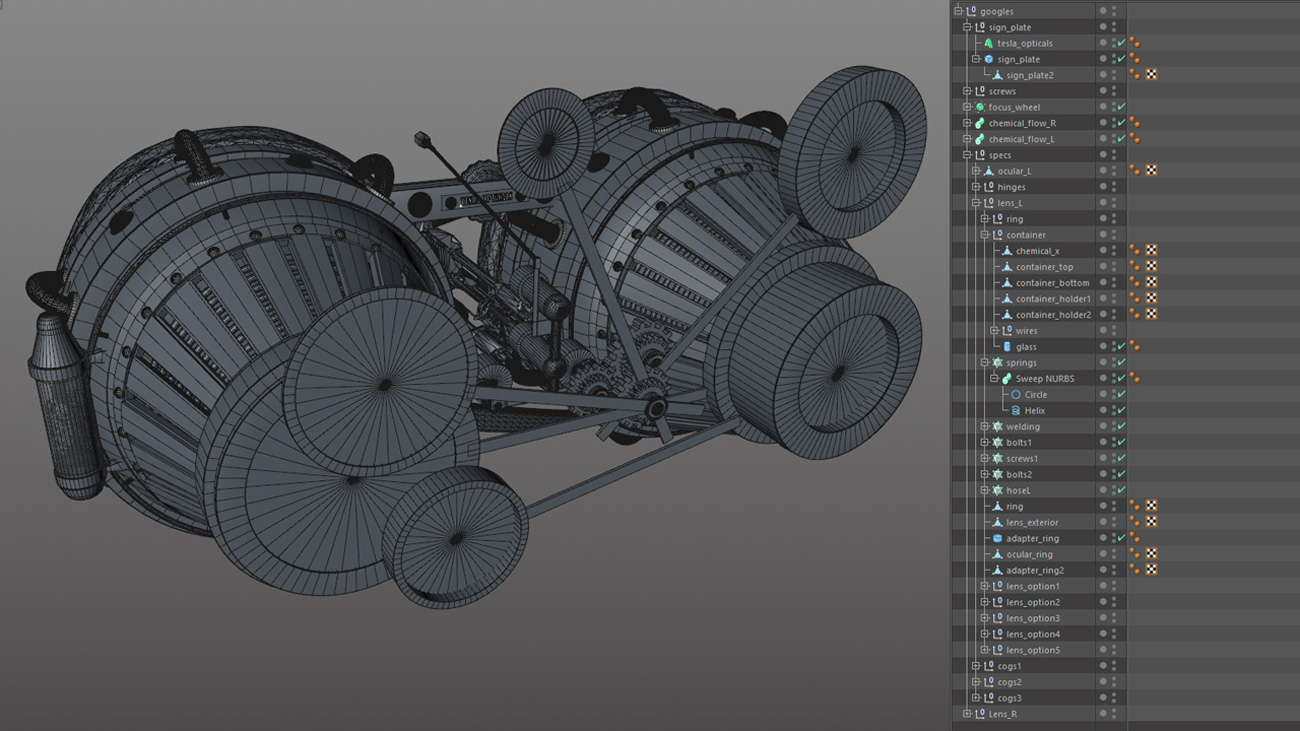
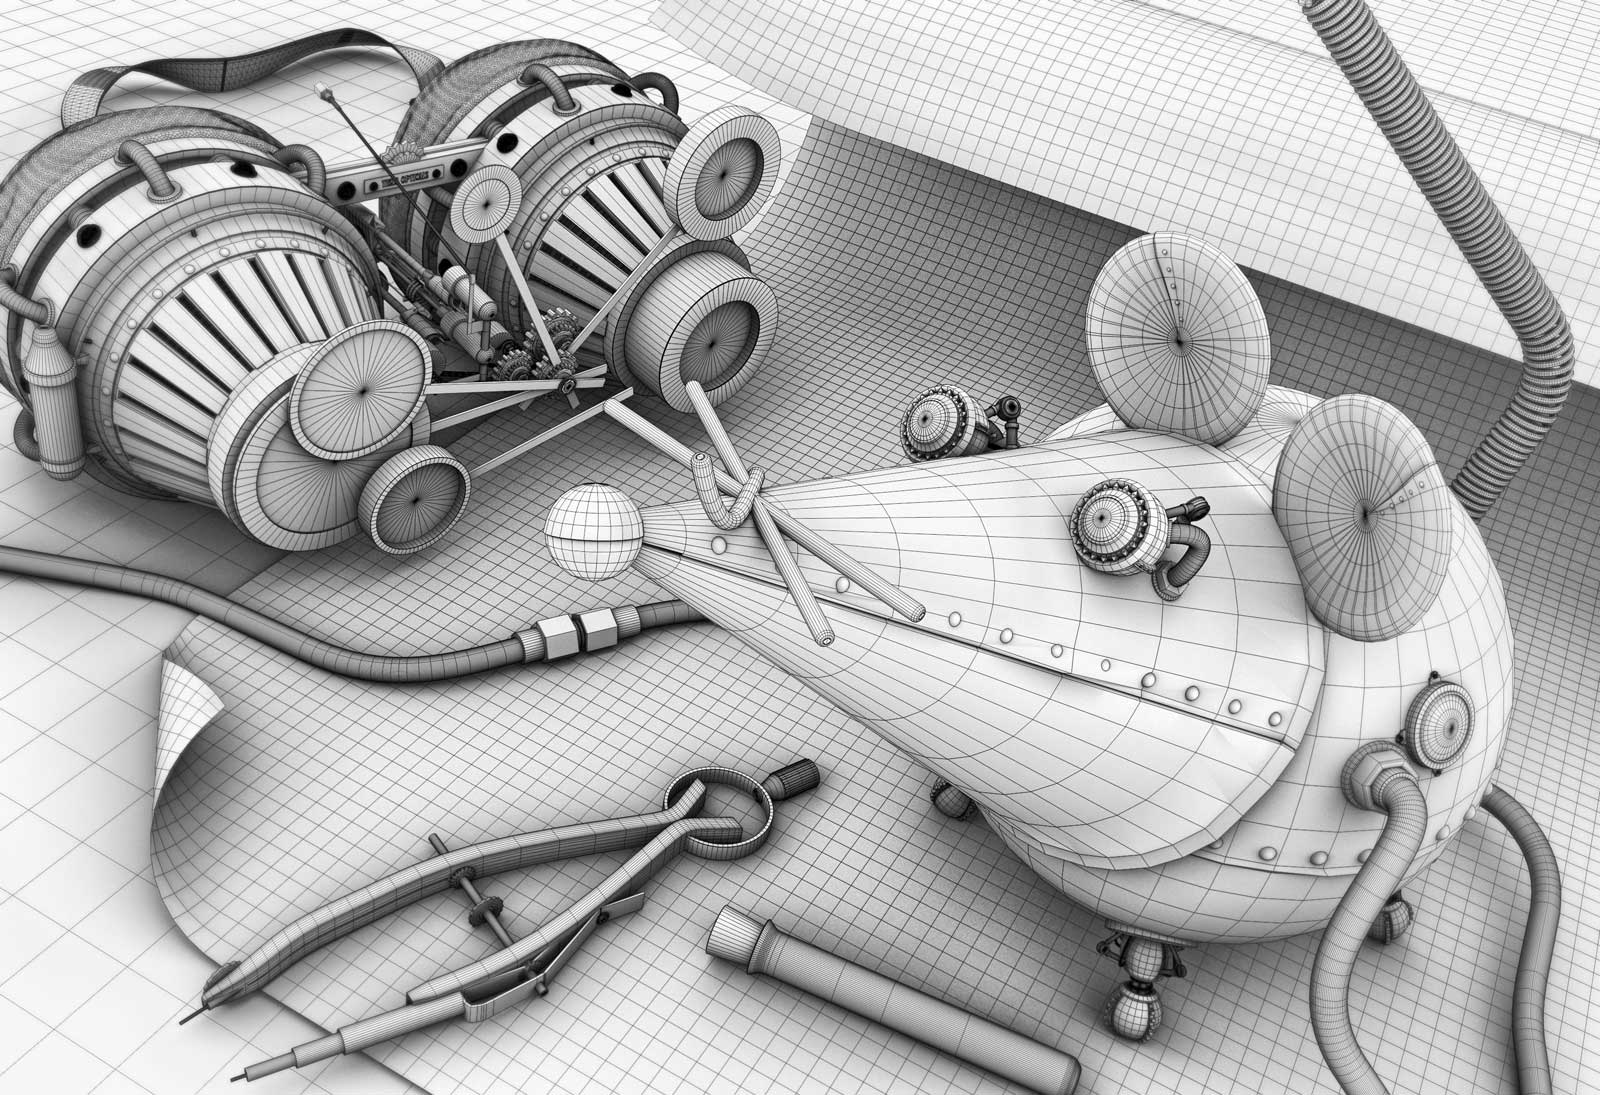
The scene is reasonably simple and modeling didn’t take too long. I started the modeling process with primitives converted into polygonal objects and I mostly used extrude, extrude inner and bevel tools. I decided to add more details to the rodent's eyes and legs because those parts would move the most, if it was actually alive.
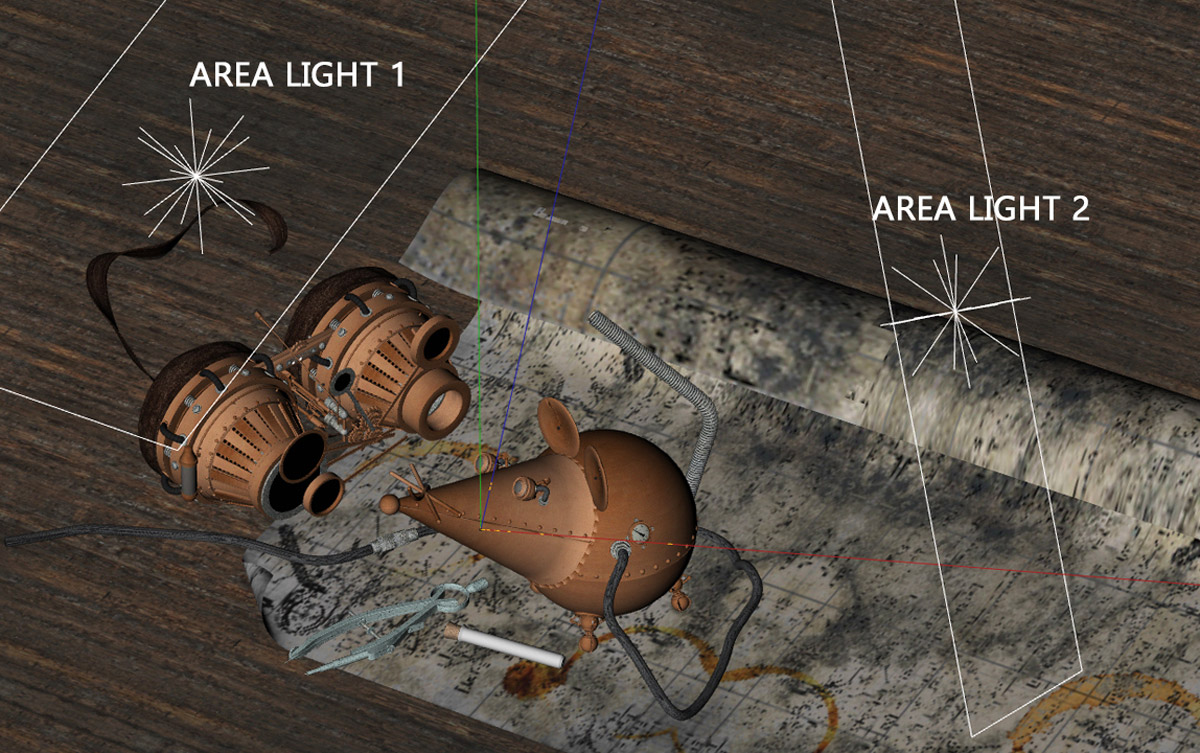
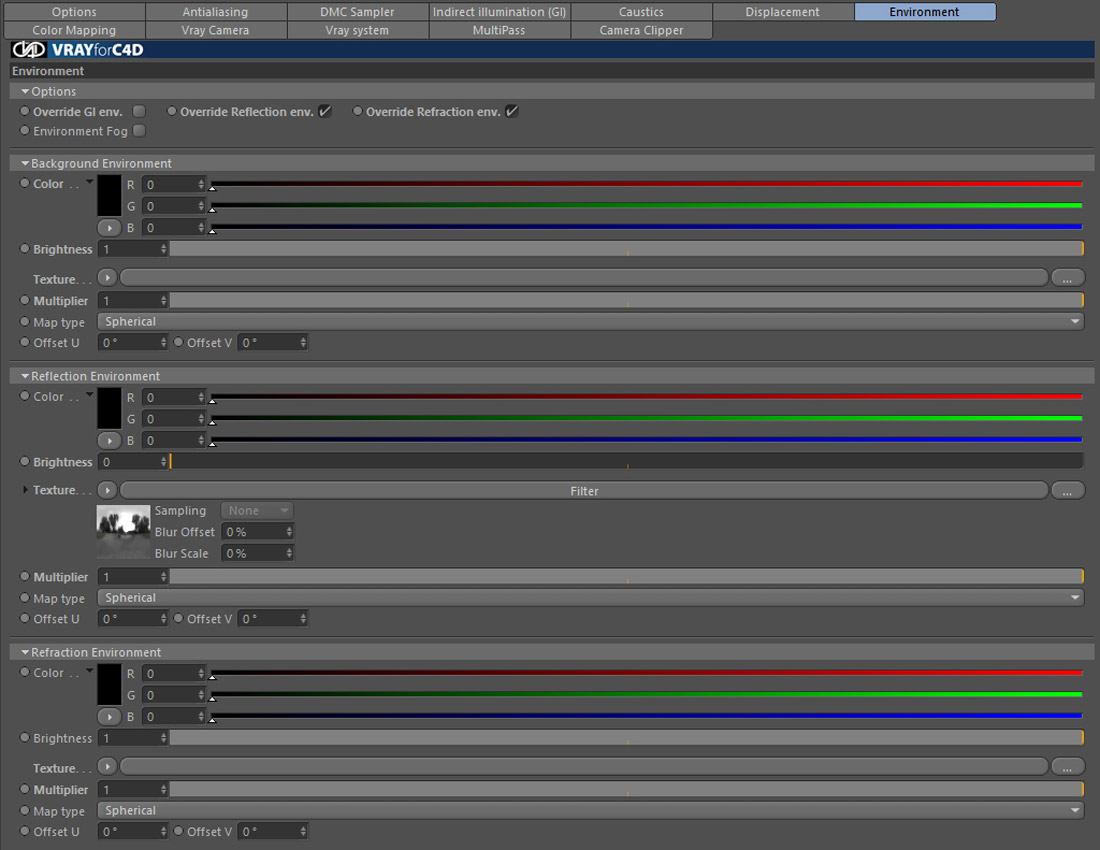
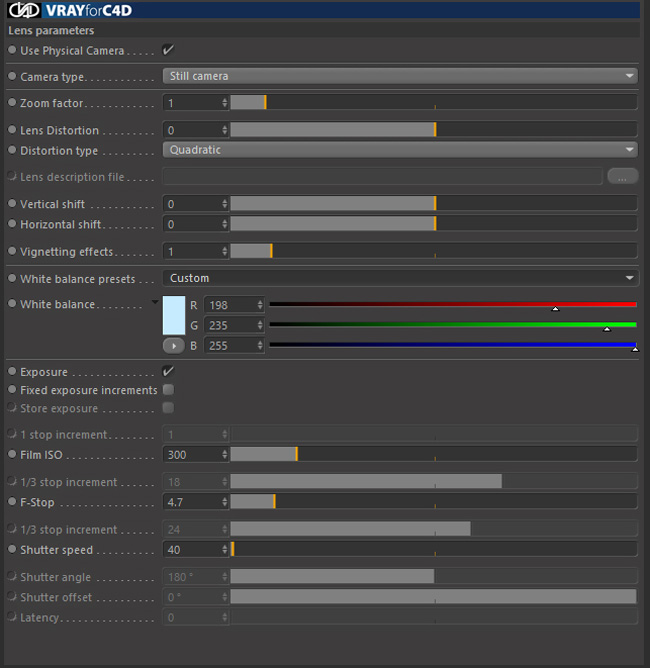
I always try to keep it simple when it comes to lighting. With this in mind, I only used two area lights for the whole scene. In order to get better reflections I loaded an hdr image on the reflection environment tab.
I mostly create textures from photographs and if necessary, I paint some details by hand. I often use vray dirt because it significantly adds to realism.
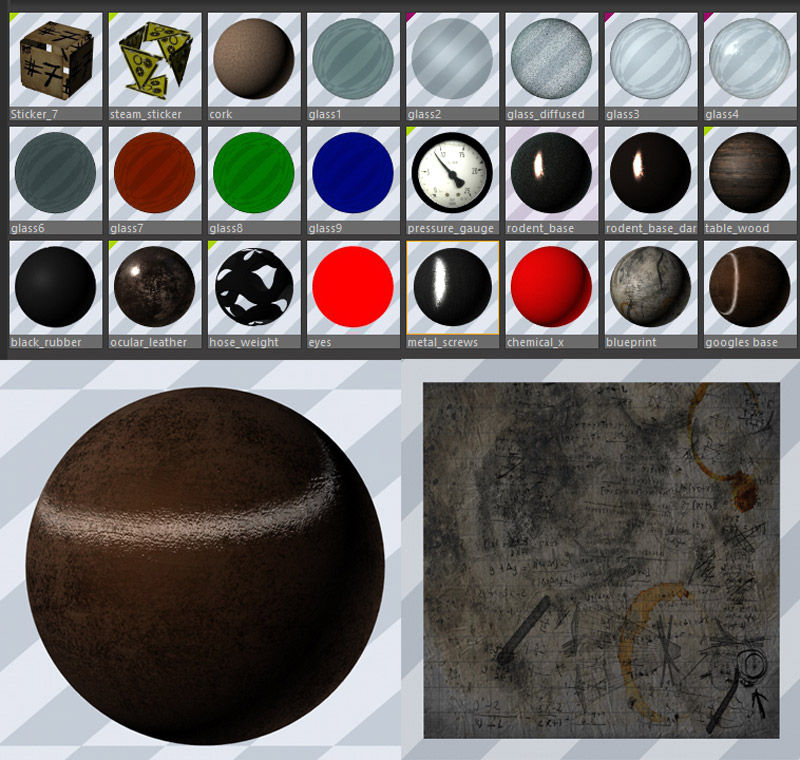
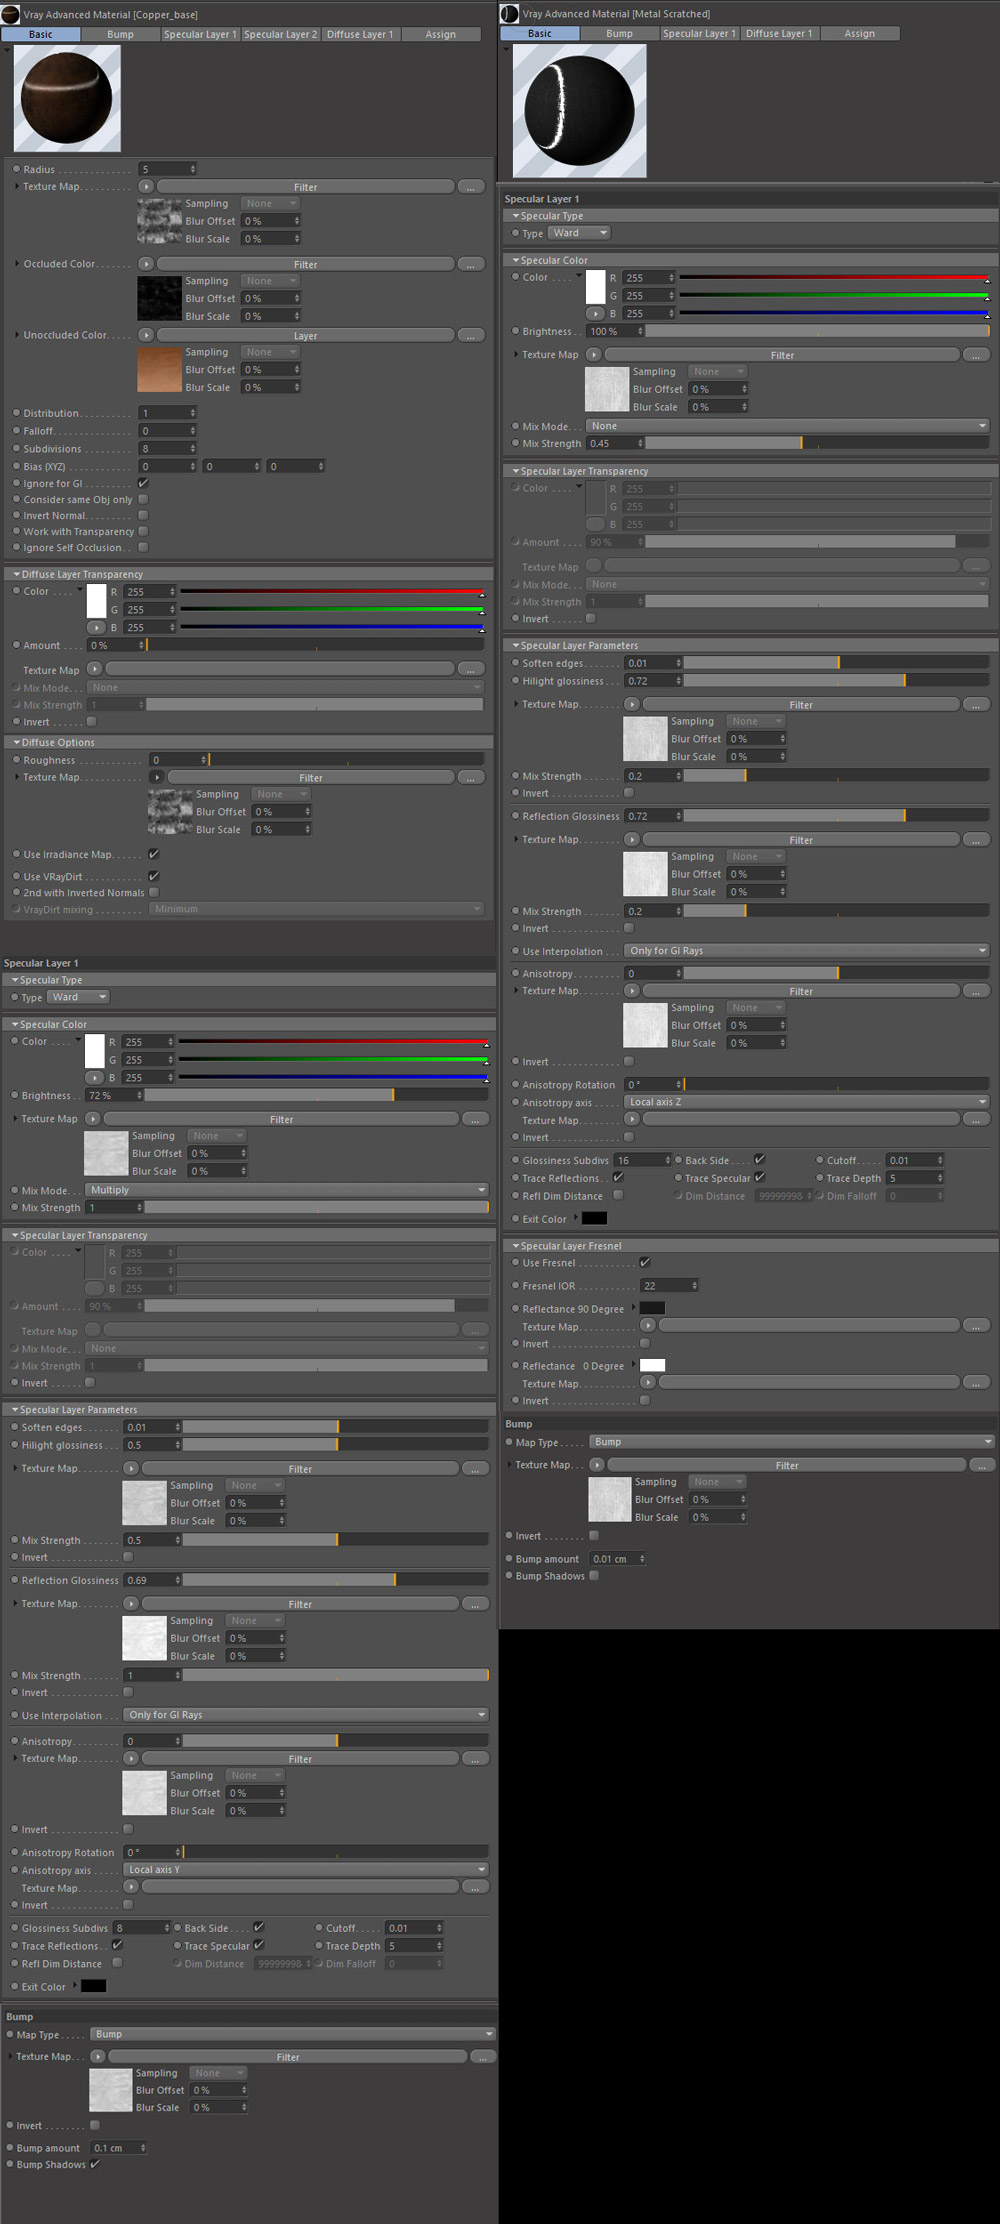
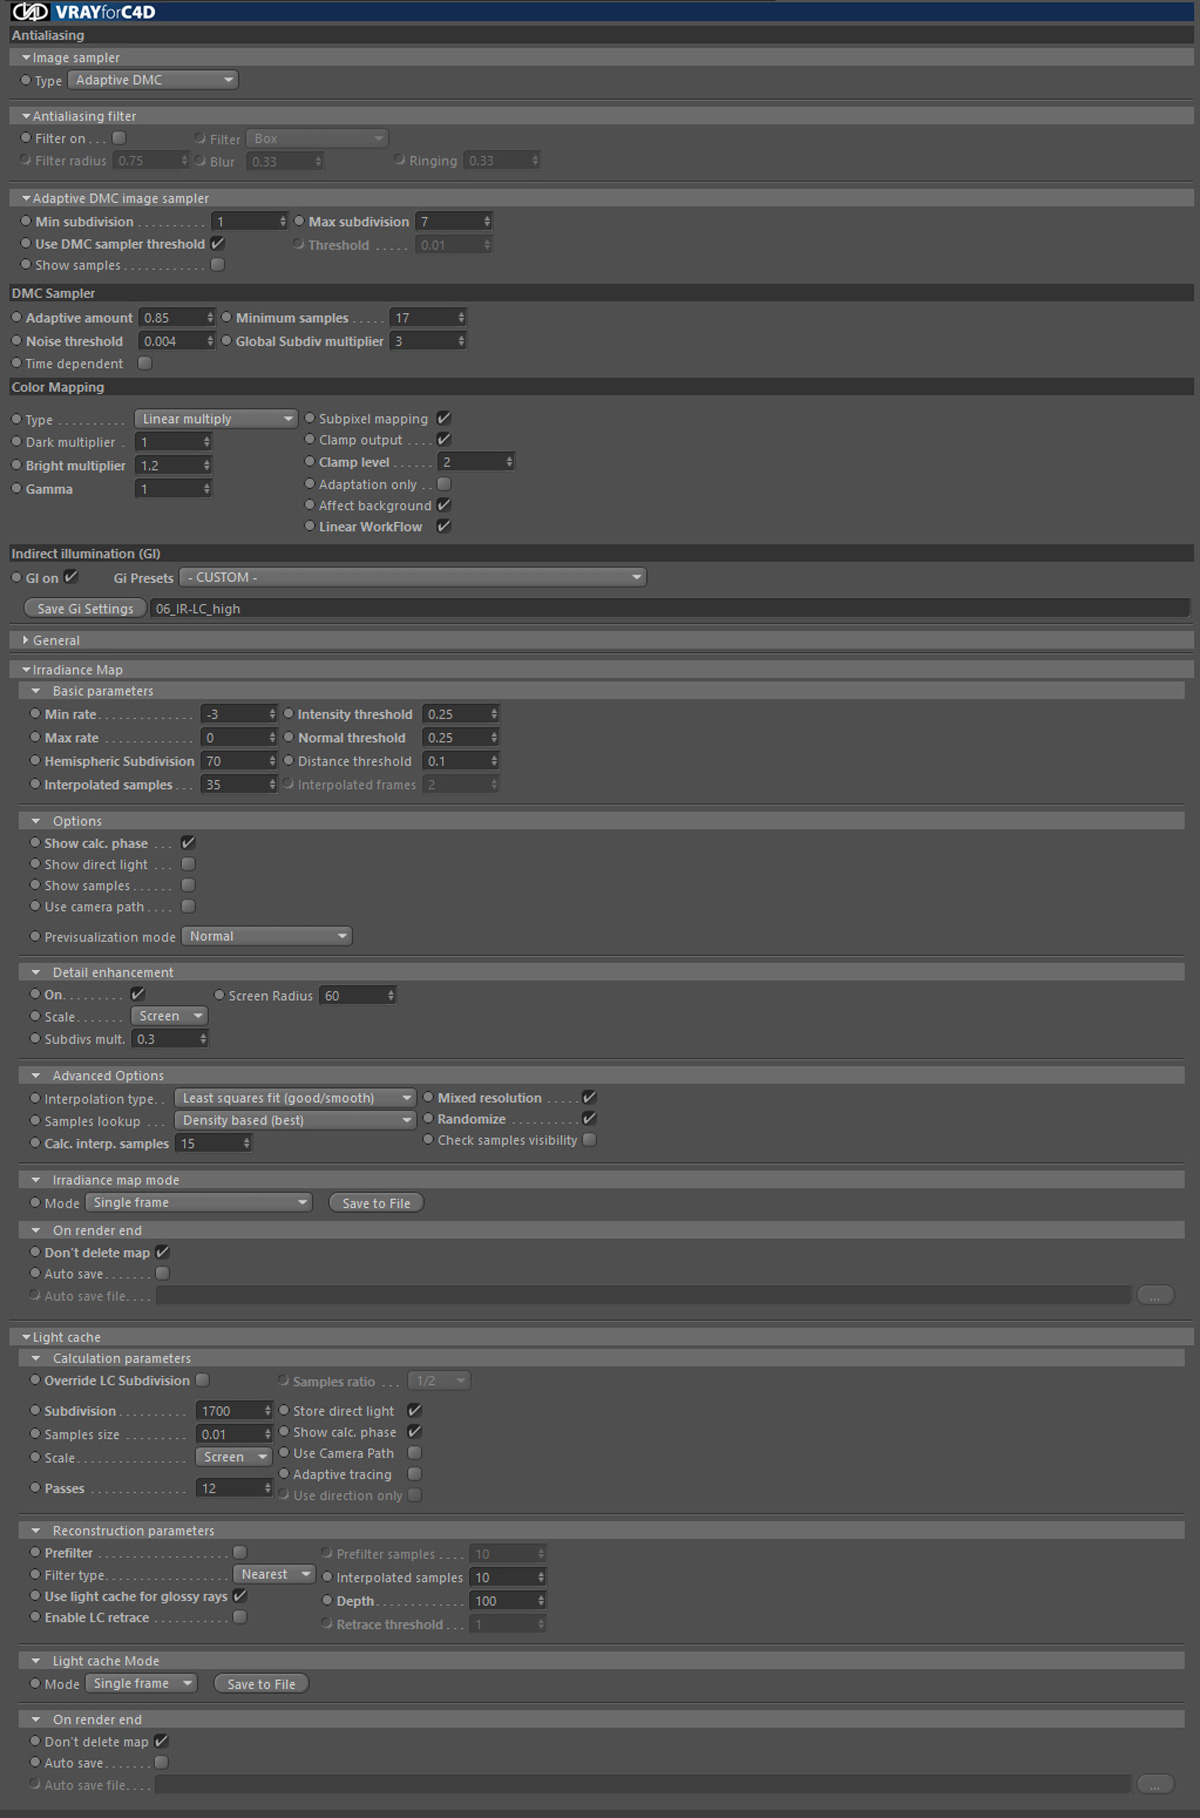
My weapon of choice for rendering is Vray. It takes some time to get used to it, but it's totally worth the effort. Render settings:
This rendered image is without post production.
For post production I used Photoshop. I separately rendered a depth pass and ambient occlusion. I used the depth pass to blur the background in order to draw attention to the rodent. I also applied some basic color correction and hand painted the steam.
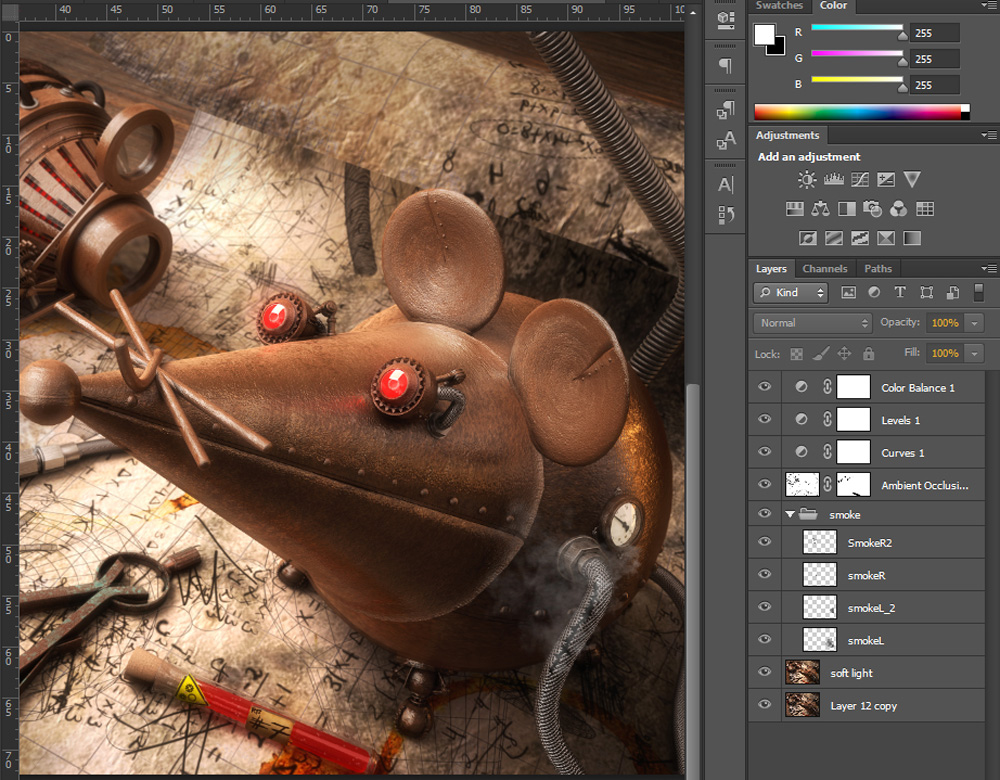
As you see, it was fairly straightforward. I hope this article gave you a good look at the creation process behind this image. if you have any questions, I’m at your disposal.